
Monday, March 28, 2011
Getting to Know You
Well, the reason I wanted to start this blog was not only to share my creations, but to interact with others that may have the same passion for baking and creating as I do. It's so exciting to see the number of you who stop by my page. I'd love for you to leave a comment the next time you stop by. If you write a blog as well, please mention it. I'd love to check it out! I'd love to get to know you!
Thursday, March 24, 2011
80th Birthday
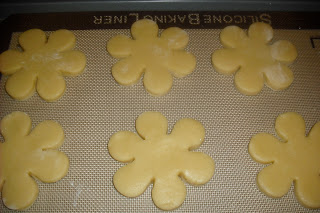
I was asked to make cookies for an 80th birthday. The color scheme was pink, purple and green, so this is what I came up with:
 I used my sugar cookie recipe and decorated them with Royal Icing.


I hope you like them Teresa!


These are some of the supplies I used. The cookie cutter is a basic flower shape that came in a box (I think from Wilton) of 100 different kinds.
I tinted the icing using Americolor gel paste coloring in bright white, soft pink, regal purple, and leaf green. (Sorry! I forgot to include that one in the photo!) For the green, I dipped a toothpick in the bottle and kept adding until I got the color I wanted.
Once the icing was mixed and colored, I used the spray bottle to gradually add water and get the consistency I needed. I'm pretty sure that tip came from SugarBelle and it's such a great one!
To outline the flowers, my icing was piping consistency and I used the small squeeze bottle with a #2 tip. I love these little bottles! I got them from Karen's Cookies.
To fill them in, my icing was flooding consistency and I transferred it to the larger squeeze bottle that I snipped the tip off of. This method works for me because I've never been able to get the hang of a piping bag!
Here's another little secret! This great tip also came from SugarBelle and it is such a time saver! I piped small circles onto waxed paper and let them dry over night. The next day, I peeled them off of the paper and put them in the center of the wet cookie. Instant flower center! No need for letting the base color dry!
When the base color was dry, I went back with white, again in the small squeeze bottle. This time, I used a #1 tip and added small dots around the centers.
The end product again:

Saturday, March 19, 2011
Sponge Bob Square Pants
Who lives in a pineapple under the sea?

I made this cake a while ago (one of the few I've ever done) and thought it was a fun one to share. The year my daughter turned 4, she was obsessed with Sponge Bob. While other girls her age were having princess parties, she insisted on a Sponge Bob theme!
To make this cake, I baked a yellow cake in a 9 x 13 pan. (I chose yellow cake so that when you cut it, it would be spongy yellow inside!)
Using vanilla frosting, I tinted most of it yellow and frosted half of the cake with it.
The middle section got frosted with the plain vanilla frosting.
For the bottom I used chocolate frosting.
For the arms, I attached a marshmallow to each side of the cake. Then, I heated some banana flavored Laffy Taffy in the microwave for a few seconds to soften it. I rolled it and flattened it into a hand shape at the end. I attached one to each marshmallow.
Using the same method as the arms, I made the legs. This time, I attached them to chocolate covered marshmallows. I used white, black and blue decorator icing (the kind that comes in a tube) for his socks
and 2 snack size Snickers for the feet.
For his eyes, I took white and blue Airheads candy and microwaved them a few second. When they were soft I flattened them out and using a scissor, cut them into 2 large white circles and 2 smaller blue circles. After I laid them on the cake, I traced around them with the black decorator icing, adding an eyeball and eyelashes.
I continued on with the black icing to make the nose and mouth. I filled in the mouth with red icing and made the tongue from a red Airhead. I used 2 Chicklets for the teeth.
To make the sponge holes, I cut yellow Dots candy into discs and placed them over his body.
I finished it off by adding his shirt collar with black icing and his tie with red.
She LOVED it!!

I made Krabby Patties too!

They're simply Nilla Wafers and Keebler mint cookies, held together with green icing. I spread a dab of honey on top of the cookie and sprinkled it with sesame seeds! The kids loved them!
Thursday, March 17, 2011
Chocolate Guinness Cupcakes With Baileys Frosting (Irish Car Bomb Cupcakes)

This year, I decided to try an "adult" recipe that I've been hearing a lot about. It's modeled after a drink called an Irish Car Bomb.

For those of you who are unfamiliar, it is a shot of Baileys with a layer of Jameson Irish Whiskey floating on top. The shot is then dropped into a glass of stout beer and the drinker must consume the entire drink before it curdles! I've never experienced the drink, but have been dying to try these cupcakes!
**While the Guinness in the cake gets baked out, the whiskey and Baileys is potent! If you're making these for people who don't drink, omit the whiskey and substitute milk or Irish Cream coffee creamer for the Baileys!
Makes 24 cupcakes
Guinness Chocolate Cupcakes
1 box chocolate cake mix + ingredients to make cake
1 cup stout (Guinness)
2/3 cup sour cream
Chocolate Filling
8 ounces bittersweet chocolate chips (Ghirardelli)
2/3 cup heavy cream
2 tablespoons butter
2 teaspoons Irish whiskey
Frosting
4 cups confectioners sugar
1 stick butter, softened
3 tablespoons Baileys
*note: This recipe did not make nearly enough frosting for all of the cupcakes. My suggestion would be to double it.
Directions
Cupcakes: Bake the cupcakes according to the box, substituting stout for the water and adding the sour cream.
Filling: Put the chocolate in a heatproof bowl. Heat the cream until simmering and then pour it over the chocolate. Let it sit for a minute to melt and then stir until smooth. (If the chocolate doesn't completely melt, you can microwave it at 30 second intervals) Add the butter and whiskey and stir until combined.
Let the mixture cool until it's thick but still soft.

While the mixture is cooling, use an apple corer to hollow out the center of the cupcakes.
( I'm going to use the centers for cake balls!)
( I'm going to use the centers for cake balls!)


Put the filling in a Ziploc bag and snip the corner off. Fill the hole in each cupcake to the top.

Frosting: Beat the butter until light and fluffy. Slowly add the confectioners sugar and continue to beat until thick. Add the Baileys and beat until combined. If the frosting seems too thin, you can just add more sugar.

YUM!!!
Happy St. Patrick's Day!
Wednesday, March 9, 2011
Sugar Cookies
Although most sugar cookie recipes are basically the same, I could never find one that I truly loved. After tinkering around with a few different ones, I came up with this one that works for me.


When you are ready to roll, dust a little flour ( too much will result in bumpy cookies) on your surface. (I like to use a rolling mat)
For easier rolling, put a piece of waxed or parchment paper on top of the dough. When you have rolled the dough to your desired thickness, (I like mine thick!) you're ready to cut.

When they are all cut out, place them on a baking sheet lined with parchment paper or a silicone mat. I found these at Costco. They were $5 for a package of 3! They work just as good as a Silpat!!


Ingredients
1 cup (2 sticks) butter (I use salted and omit the salt from the recipe)
2 cups sugar
4 eggs
2 tsp. vanilla
5 cups flour
Directions


Cream the butter and sugar. Add the eggs and vanilla continuing to beat until light and fluffy.


At this point, if you have a dough hook, you can attach it. Gradually add the flour and continue to mix until it forms a stiff dough. Scrape down the sides and form a ball.
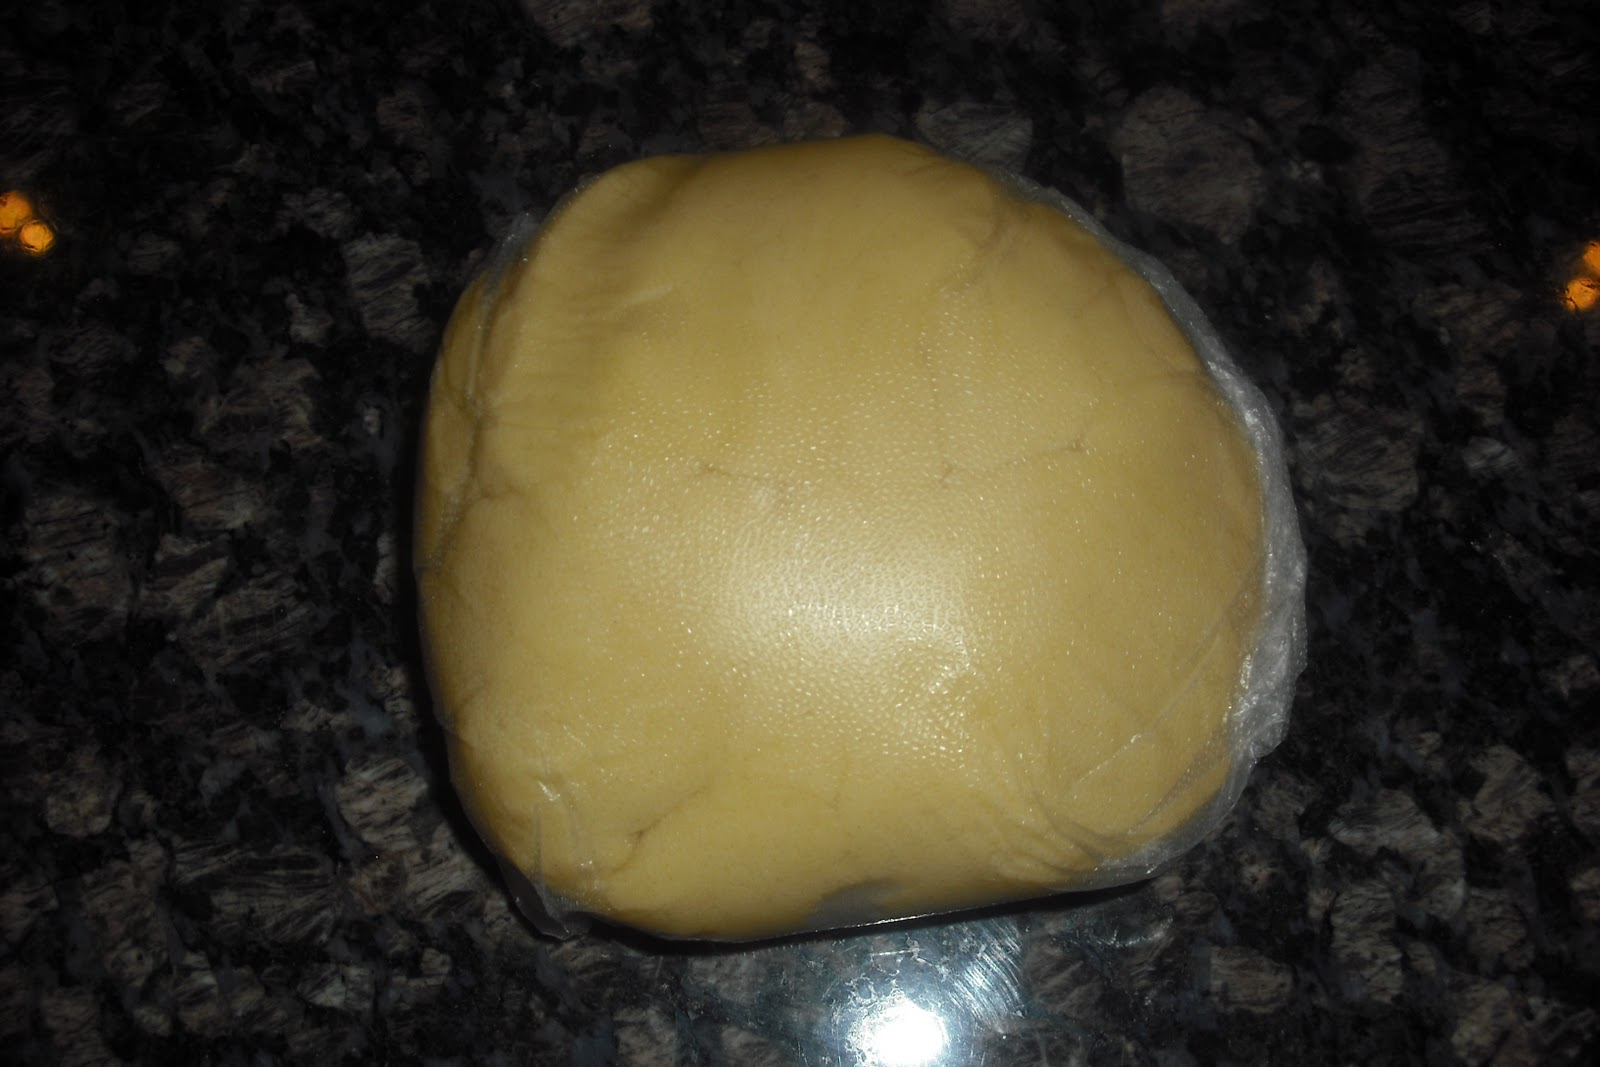
Divide this ball into two smaller ones and cover with plastic wrap. Refrigerate the dough for at least 2 hours.
When you are ready to roll, dust a little flour ( too much will result in bumpy cookies) on your surface. (I like to use a rolling mat)
For easier rolling, put a piece of waxed or parchment paper on top of the dough. When you have rolled the dough to your desired thickness, (I like mine thick!) you're ready to cut.

When they are all cut out, place them on a baking sheet lined with parchment paper or a silicone mat. I found these at Costco. They were $5 for a package of 3! They work just as good as a Silpat!!

The next step is crucial!! Place the cookies in the freezer for 5 minutes. This is how the cookies keep their shape when baking. I never knew this and am so glad I do now!
Bake the cookies in a preheated 350 degree oven for 12-15 minutes. Immediately transfer them to a cooling rack. Once cooled, they're ready to decorate. I use Royal Icing, but you can glaze, fondant or whatever kind of frosting you like.


Happy cookie baking!
Monday, March 7, 2011
Cake Pops!
About a year ago, I stumbled upon a website called Bakerella. The thing that caught my eye was something called a Cake Pop. I was intrigued by these little creations made with cake, frosting, candy coating, and a variety of candy decorations and since I secretly want to be the next Martha Stewart, (oops! guess my secret is out--please don't laugh!) I decided to give them a try. They received rave reviews and after making them for several occasions people asked if they could buy them! Here is the way I make mine and a few pictures of some I have made.


First, I bake a cake. When it has cooled completely, I cut off all the dark edges.

Next, I put the cake into my Kitchen Aid mixer with the paddle attachment and mix
until fine crumbs are formed.


Then, I add a spoonful of frosting at a time while mixing, until a ball of dough is formed
in the bowl of the mixer.


At this point, I usually put it in the refrigerator for a few hours to chill.
When I take it out, I use a small cookie scoop to scoop out a uniform size. They are then rolled by hand into balls


Next, it's time to break out the melting pot. This is yet another one of my gadgets that I just can't live without! Just put the candy melts into the pot and flip the switch to melt. I stir it every once in a while until fully melted. Then, flip the switch to warm and the chocolate will stay at the perfect temperature! You can also use a double boiler method or melt in the microwave at 30 second intervals. If the candy seems too thick, add a little shortening or vegetable oil to thin it out. It should pour off of a spoon, not plop!


Dip a lollipop stick into the melted candy and then press the stick into your cake ball. Return them to the refrigerator for about 5 minutes to harden the chocolate. This will enable you to dip the pops without them falling off the stick.

Take them out of the refrigerator a few at a time. Submerge the pop in melted chocolate to cover it but be careful not to twirl it around or it will fall off the stick! Pull it out and let the excess chocolate drip back into the pot. Depending on how you want them to look, you can either set them on waxed paper to dry or let them dry upright. If you are drying them upright, stick them in a block of Styrofoam.


When they dry, they are ready to decorate. I've decided to cover mine in sanding sugar. I quickly plunge each pop into some warm water and immediately, over a bowl, sprinkle with the sugar until covered. You can reuse the sugar that lands in the bowl.

The decorating possibilities are endless. Here's a look at just a few

The pops will keep for about 2 weeks if kept in an airtight container or individually wrapped , but I've never known them to be kept around that long!
Friday, March 4, 2011
Tiramisu Cupcakes
Being Italian, one of my family's favorite desserts is Tiramisu. While I do make it occasionally, I decided to make it in cupcake form for my husband's birthday and they were a HUGE hit! My 95 year old grandmother was raving about them, so I decided to whip up another batch. Yes! They're that easy!


Ingredients
Cupcake
1 package white, yellow or vanilla cake mix (I used vanilla) + ingredients listed on box to make cake
Liquid Coffee Layer
2/3 cup boiling water
1/2 cup confectioners' sugar
1 1/2 tablespoons instant coffee
Mascarpone Filling
1 cup mascarpone cheese (cream cheese can be substituted)
3 tablespoons Kahlua
1/4 cup sweetened condensed milk
1 (8 ounce) container Cool Whip
Frosting
1 (8 ounce) package cream cheese, softened
1/2 cup (1 stick) butter, softened
2 cups confectioners' sugar
1 teaspoon vanilla extract
chocolate shavings (to garnish)
Directions
Bake cupcakes according to directions on cake box.
When cupcakes have cooled, dissolve confectioners' sugar and instant coffee in boiling water. Using a fork, pierce holes in cupcake. Brush coffee mixture onto cupcake, allowing it to soak into holes.


Beat mascarpone, Kaluha and condensed milk until smooth. Fold in Cool Whip and transfer mixture into a piping bag. Inject filling into center of cupcakes.

Beat cream cheese and butter until smooth. Gradually add sugar and continue beating until light and fluffy. Add vanilla.
You are now ready to frost! I used a piping bag, but you can just frost with a knife if you'd like. Garnish with chocolate shavings.


These are for you Nonie!
Subscribe to:
Posts (Atom)