Monday, September 17, 2012

Caramel Apple Tart

Fresh Fruit Tart


I know, this picture doesn't match the title of the post, but . . . .


http://www.pauladeen.com/recipes/recipe_view/fresh_fruit_tart/

It all started with this recipe.  I had somewhere to go and needed a dessert so I thought I'd give this a try.  It seemed easy enough and turns out, it was!

Unfortunately, I forgot to take a picture, but I swear, mine looked identical to this!

Then, I made it again for a friend on a gluten-free diet.  I substituted white rice flour for the all-purpose flour and it came out equally delicious!

When the third time came around, I decided to give it a Fall flavor so I used apples and caramel.  The results did not disappoint.

Whichever route you decide to take, they are all equally delicious!


Caramel Apple Tart

Crust:

1 1/2 sticks butter at room temperature
1/2 cup powdered sugar
1 1/2 cups flour

Mix butter and sugar.  Add flour until dough forms.  Press dough into tart pan with removable bottom.  (I left the bottom of the bottom of the pan at my friend's house so I used a spring form pan instead)
Bake crust for 12 minutes at 350 degrees.  Allow crust to cool.

Cream:

8 oz  cream cheese
1/2 cup powdered sugar
1 tsp vanilla

Mix all ingredients until smooth.  Spread over cool crust

Caramel:

2 cups sugar
1 1/2 sticks butter softened and cut into pieces
1 cup heavy cream, room temperature

In a heavy saucepan, heat sugar until melted, whisking often.  Once sugar is melted and turns golden, add the butter and continue to stir.  Once mixture comes to a boil, remove from heat and slowly add cream while continuing to stir.  caramel will thicken as it cools.  Once cool, spread over cream cheese mixture.

Top with sliced apples.  I used 1 1/2 Honey Crisp apples.  Then drizzle with more caramel and top with Heath bits.


Thursday, September 13, 2012

DIY Apothecary Jars

I've been seeing these every where and just couldn't resist making my own.  They were super simple and super CHEAP!  I made these three for under $10!

I found the candle sticks at Goodwill.  They had a brass finish and I simply spray painted them black.
I found the jars at Dollar Tree and glued them to the sticks.
The tops are wooden circles with knobs glued to them.  They were also spray painted black.
I found some cute Halloween ribbon at Michaels and we're done!

I love that all I have to do is change the ribbon and they'll be ready for another holiday!
I also love that the lids just rest on the jars so the kids just simply lift them off to take a treat!

I can't wait to display them with some of my other Halloween creations!

Wednesday, September 12, 2012

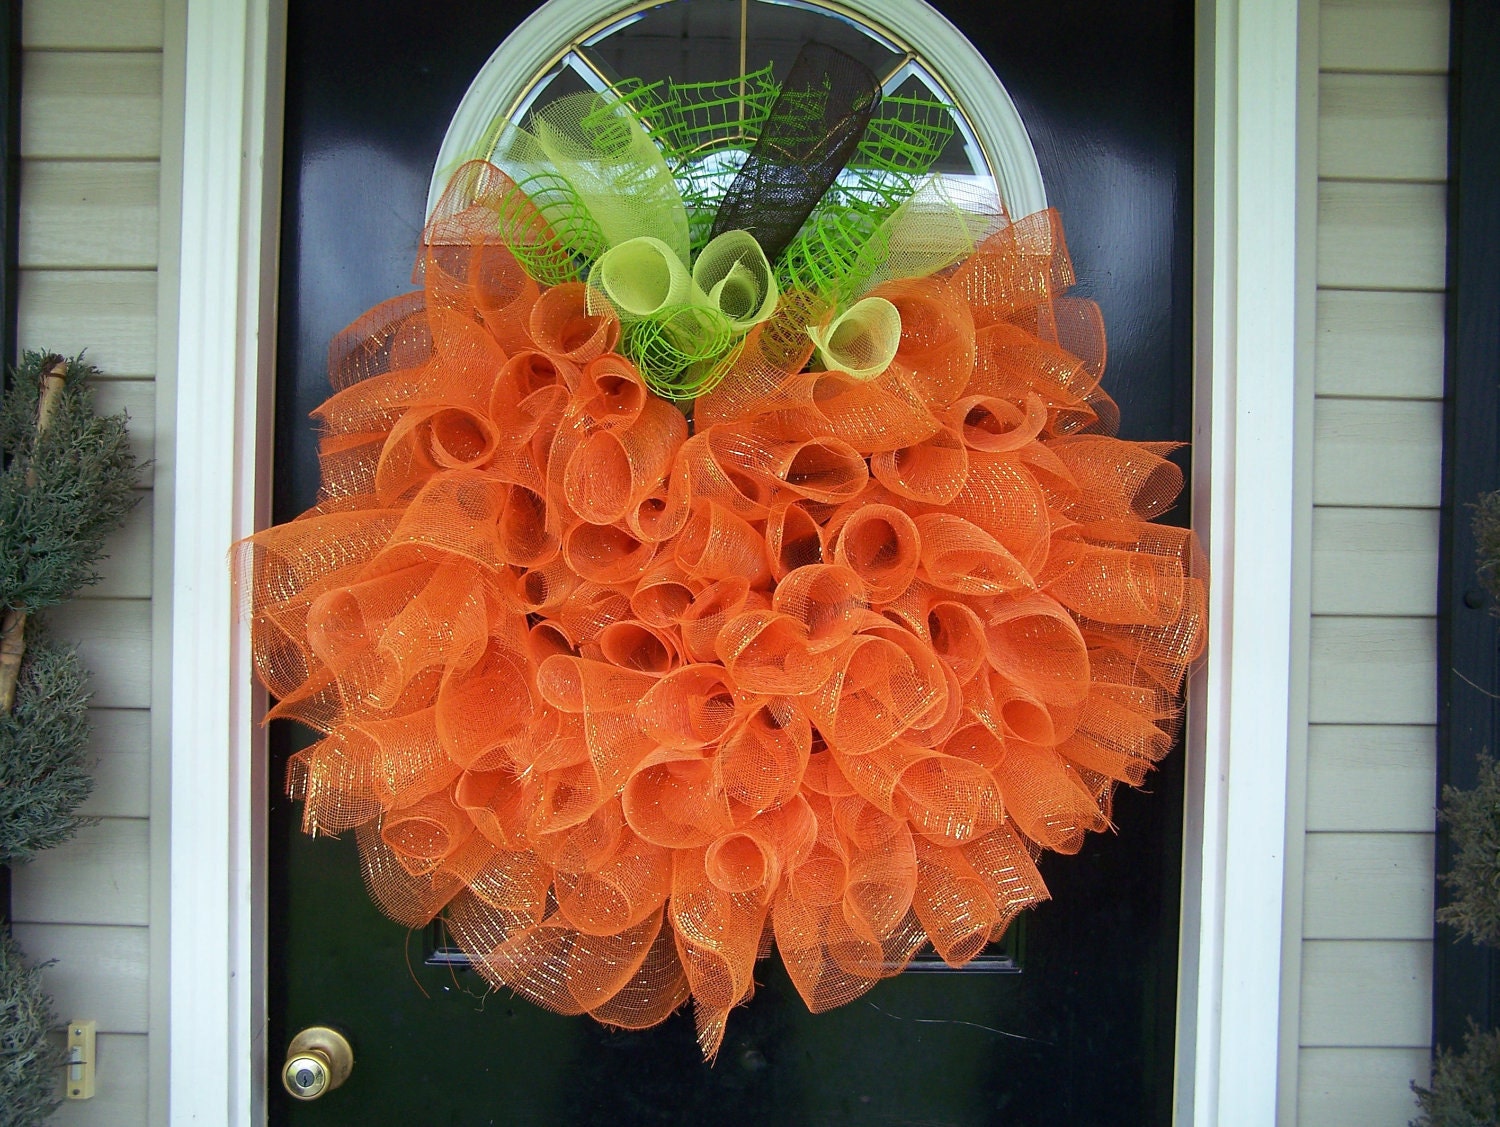
Tulle Pumpkin Wreath

It all started with this picture I saw on Pinterest.

Handmade Front Door Deco mesh Halloween Fall Thanksgiving Pumpkin Wreath


http://www.etsy.com/listing/103325491/handmade-front-door-deco-mesh-halloween?ref=sr_gallery_23&ga_search_query=pumpkin+wreaths&ga_view_type=gallery&ga_ship_to=US&ga_search_type=handmade

Yes, I took just one look and knew I had to have one.  However, I wasn't crazy about paying that much for it when I knew I could probably do it myself!

Sooooo, I kept analyzing it to try and figure out how it was made and then I stumbled upon this . . .

Pumpkin Wreath tutorial! :)

After looking it over I went out to gather my supplies only to realize I didn't buy the right kind of mesh!    
My first attempt had failed, but I wasn't going to give up!

During one of my travels to Joann Fabrics, I noticed they sold 15 yard spools of tulle for only $2.99!!!
I knew some how, some way, I was going to make this work!

So I followed the basic directions and improvised.  I used

10" embroidery hoop
orange latch hook canvas
2 spools orange tulle
8 pieces green tulle
1 piece black tulle
floral wire

First, I stapled the latch hook canvas to the embroidery hoop

Then, I cut the tool into 10'' strips.  I rolled the strip into a tube and fastened it with the wire
I poked the wire through the holes (not every one!) and then twisted the wire on the back
When all the orange was filled in, I attached some green pieces for leaves and a black piece for the stem


Not the exactly the same, but pretty close!
What do you think?

Wednesday, March 21, 2012

Inspired by Pinterest

It's been quite a while!  I've still been baking but unfortunately I haven't been faithful about blogging about it.

I've also been spending a lot (A LOT) of time on Pinterest.  If you don't know what I'm talking about, you've got to check it out here.  Once you try it, I'm sure you'll be addicted like I am!

I must say I've been quite inspired by so many of the pins I've seen and thought I'd try to replicate some of them.

Here are a few:
The directions for this jellybean holder can be found here.

and the directions for this adorable Easter wreath can be found here.

I hope you'll be inspired to try them too!

Wednesday, December 21, 2011

Christmas Popcorn and Hot Chocolate Spoons

My turn to bring snack so I had to think of something semi-healthy with a holiday theme.  I loved the idea of Cookies & Cups Santa Hat Party Mix but wanted to lighten up on the sugar so I did my own take on it.

First, I made the Santa hats.  For some, I used nonpareils but for others, I used white sanding sugar. (I liked those better!)

Then, I took a regular bag of popcorn
and a can of this
I sprayed the popcorn on a cookie sheet lined with paper towels.

Then, I mixed them both with some holiday m&ms.
The girls loved it!

I thought it would be fun to serve it with hot chocolate, especially since I was dying to use my new carafe I picked up for $2.99!!!!

I dipped plastic spoons into melted chocolate chips, making sure the spoon was full of chocolate.  I set the spoons on a cookie sheet lined with wax paper and before they set up, I sprinkled them with mini chips and marshmallows.
The girls had so much fun swirling them in the warm milk!

Tuesday, December 13, 2011

Snowman Votive Holder

Looking for a cute, inexpensive gift?  Look no further!  I wish I could take credit for this, but the original idea came from Tatertots and Jello.  I adapted it slightly and am in love with it!  It was so simple to make too!

All you need:


1 wine glass (Dollar Tree)
Air-Dry Clay ($4.99 for a HUGE container)
Snow-Tex ( I used my Michael's coupon!)
E-6000 (Michael's coupon again!)
scarf (I got this at the Dollar Tree but you could also use felt)

1.  Paint the wine glass with the Snow-Tex and let dry.

2.  While the paint is drying, shape the clay into eyes, a carrot nose and mouth and then     
     paint.

3.  When all paint is dry, glue your pieces to the glass with E-6000.

4.  Cut a strip from the scarf and tie around the stem of the glass.

5.  Add a votive candle and you have it!

 Now, who to give them to . . . . .

Wednesday, November 23, 2011

Happy Thanksgiving

Just thought I'd share my famous Thanksgiving appetizer that the kids look forward to every year.  The original idea came from Family Fun, but I've expanded on it over the years.  The base is simply a sugar pumpkin because I thought it was the perfect size.  Skewer some olives and tomatoes, (the olives were a BIG hit with Ava's class!) add carrots and cucumbers with toothpicks.  The head is an orange baby bell pepper and the waddle and feet are a cut red one.  The beak is a carrot attached with a toothpick and the eyes are olives that I cut in half.  Serve with ranch dip!

While we're all stuffing ourselves, I always like to sip on something festive!  This year I decided to go for a spiced cider cocktail.
Fill a shaker with ice.  Pour in 1 ounce Spiced Rum, 1 ounce Cinnamon Schnapps and 4 ounces of apple cider.  Shake and pour over ice.  Garnish with a cinnamon stick.

Happy Thanksgiving!