My turn to bring snack so I had to think of something semi-healthy with a holiday theme. I loved the idea of Cookies & Cups Santa Hat Party Mix but wanted to lighten up on the sugar so I did my own take on it.
First, I made the Santa hats. For some, I used nonpareils but for others, I used white sanding sugar. (I liked those better!)
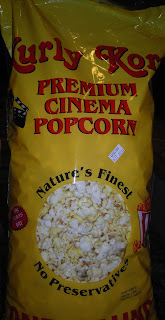
Then, I took a regular bag of popcorn
and a can of this
I sprayed the popcorn on a cookie sheet lined with paper towels.
Then, I mixed them both with some holiday m&ms.
The girls loved it!
I thought it would be fun to serve it with hot chocolate, especially since I was dying to use my new carafe I picked up for $2.99!!!!
I dipped plastic spoons into melted chocolate chips, making sure the spoon was full of chocolate. I set the spoons on a cookie sheet lined with wax paper and before they set up, I sprinkled them with mini chips and marshmallows.
The girls had so much fun swirling them in the warm milk!

Wednesday, December 21, 2011
Tuesday, December 13, 2011
Snowman Votive Holder
Looking for a cute, inexpensive gift? Look no further! I wish I could take credit for this, but the original idea came from Tatertots and Jello. I adapted it slightly and am in love with it! It was so simple to make too!
All you need:
Now, who to give them to . . . . .
All you need:
1 wine glass (Dollar Tree)
Air-Dry Clay ($4.99 for a HUGE container)
Snow-Tex ( I used my Michael's coupon!)
E-6000 (Michael's coupon again!)
scarf (I got this at the Dollar Tree but you could also use felt)
1. Paint the wine glass with the Snow-Tex and let dry.
2. While the paint is drying, shape the clay into eyes, a carrot nose and mouth and then
paint.
3. When all paint is dry, glue your pieces to the glass with E-6000.
4. Cut a strip from the scarf and tie around the stem of the glass.
5. Add a votive candle and you have it!
Now, who to give them to . . . . .
Wednesday, November 23, 2011
Happy Thanksgiving
Just thought I'd share my famous Thanksgiving appetizer that the kids look forward to every year. The original idea came from Family Fun, but I've expanded on it over the years. The base is simply a sugar pumpkin because I thought it was the perfect size. Skewer some olives and tomatoes, (the olives were a BIG hit with Ava's class!) add carrots and cucumbers with toothpicks. The head is an orange baby bell pepper and the waddle and feet are a cut red one. The beak is a carrot attached with a toothpick and the eyes are olives that I cut in half. Serve with ranch dip!
While we're all stuffing ourselves, I always like to sip on something festive! This year I decided to go for a spiced cider cocktail.
Fill a shaker with ice. Pour in 1 ounce Spiced Rum, 1 ounce Cinnamon Schnapps and 4 ounces of apple cider. Shake and pour over ice. Garnish with a cinnamon stick.
While we're all stuffing ourselves, I always like to sip on something festive! This year I decided to go for a spiced cider cocktail.
Fill a shaker with ice. Pour in 1 ounce Spiced Rum, 1 ounce Cinnamon Schnapps and 4 ounces of apple cider. Shake and pour over ice. Garnish with a cinnamon stick.
Happy Thanksgiving!
Monday, November 21, 2011
DIY Cake Stand
I love to entertain and will jump at any chance to host a party! Part of what I love about parties is decorating and presenting the food in creative ways. Anyone who knows me well, knows I have a dish, plate or tray for almost every occasion! My cabinets are completely full!! When it came time to throw my daughter's birthday party, I knew exactly what theme and colors I was going with but fell short on a few items I wanted. I 'm constantly surfing the web and have come across many sites with directions for making your own cake stands so I figured why not? Well, let me tell you, it was so easy and so cheap I will definitely be making more!
Just go to the Dollar Store and purchase these
Just go to the Dollar Store and purchase these
The glue came from Michael's Crafts (I used a coupon!)
Glue the candlestick to the dish and let the glue dry over night
Either leave as is, or simply paint it with the spray paint of your choice
It's that easy to color coordinate for any event! I think this could become addicting!
I used this one for some cookies
*Please note that these are not food safe because of the paint. Simply use a doily, clear plate or in this case, paper plate on top. As you can see, I didn't just stop at the cake stand. The candy/cookie jars are simply a glass and candlestick!
HAVE FUN!
Wednesday, November 9, 2011
Baked Pumpkin Spice Donut Holes
Donuts
1 3/4 cups flour
2 teaspoons baking powder
1/2 teaspoon salt
1/2 teaspoon cinnamon
1/2 teaspoon nutmeg
1/2 teaspoon ginger
1/3 cup vegetable oil
1/2 cup brown sugar
1 egg
1 teaspoon vanilla extract
3/4 cup canned pumpkin (not pie filling)
1/2 cup milk
Coating
1 stick unsalted butter, melted
2/3 cup sugar
2 Tablespoons cinnamon
Preheat oven to 350 degrees and spray a 24 cup mini muffin tin with baking spray.
In a medium bowl, whisk together flour, baking powder, salt and spices. In a separate bowl, whisk together oil, brown sugar, egg, vanilla, pumpkin and milk. Add dry ingredients to wet and mix until just combined.
Divide batter evenly among muffin cups. I used a small scoop
then bake 10 -12 minutes.
While the muffins are baking, melt butter in one bowl and combine sugar and cinnamon in another bowl. Remove muffins from oven and cool until able to handle. Dip each muffin in melted butter, then roll in cinnamon sugar to coat.
YUM!!
*These are best dipped and coated the same day because they can get soggy. I really wouldn't know though, because they they all went!
Sunday, October 23, 2011
Candy Corn Martini
I learned a little trick that will result in a great big treat!
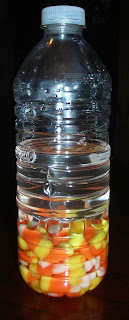
I've been hearing a lot about candy infused vodka and just had to give it a try. I figured since it was Halloween, I'd start with candy corns!
I've been hearing a lot about candy infused vodka and just had to give it a try. I figured since it was Halloween, I'd start with candy corns!
Candy Corn Infused Vodka
1/2 cup candy corn
1 cup vodka
Place the candy corn in a glass or bottle and cover with vodka.
After a few hours it will look like this!
Strain the vodka into a decorative bottle to store. (Maybe next time!) Now you're ready for your cocktail!
Candy Corn Martini
4 ounces candy corn vodka
2 ounces orange liquor (I used Cointreau)
1 egg white, optional
candy corn, for garnish
colored sugar, for garnish
Rub a slice of citrus fruit around the rim of your glass (I used orange) and then dip it in the sugar.
Place a few candy corns in the bottom of your glass.
Fill your shaker with ice and then add vodka, orange liquor and egg white. (I did not use egg white)
Shake and pour into your glass.
A little treat for you to sip on while you're handing out the candy! Please beware, this drink is incredibly sweet! It's meant to be sipped slowly!
Now that I know this little trick, I think I'll try it with bubblegum, maybe some Jolly Ranchers, and definitely candy canes at Christmas!
Thursday, October 20, 2011
2 Ingredient Pumpkin Cake
I found this on Pinterest and had to see if it really worked. I mean, how could you possibly make a great tasting cake with only these 2 ingredients?
Well, you can! This cake was incredibly easy, very moist and super delicious! I will definitely be making this again!
Well, you can! This cake was incredibly easy, very moist and super delicious! I will definitely be making this again!
2 Ingredient Pumpkin Cake
compliments of Noble Pig
1 box white, yellow or spice cake mix
1 15 ounce can of pumpkin (not pie filling)
Simply mix the cake mix together. The batter will be thick.
Pour the batter into a greased 11 x 7 pan and bake at 350 degrees for 30 minutes.
While the cake is cooling, you can mix up the glaze. (ok, so there are a few more ingredients!)
Glaze
1 1/2 cups powdered sugar
3 tablespoons apple cider
1 teaspoon pumpkin pie spice
Mix all ingredients. Invert cooled cake onto platter and spoon glaze over cake, letting it run down the sides.
This cake is best served warm but is delicious at room temperature too. Enjoy!
Sunday, October 16, 2011
Pumpkin Blondies
Today my husband told me all the sweets I make are making him fat! He told me I needed to make more fruits and vegetables instead. Pumpkin is a fruit--right?!
Pumpkin Blondies
2 cups flour
1 tablespoon pumpkin pie spice
1 teaspoon baking soda
3/4 teaspoon salt
1 cup (2 sticks) softened butter
1/2 cup sugar
3/4 cup brown sugar
1 egg
2 tsp. vanilla
1 cup pumpkin
1 cup white chocolate chips
Mix dry ingredients in a bowl and set aside.
Beat butter and sugars until creamy. Add egg, vanilla, pumpkin and continue to beat. Add dry ingredients and continue to beat. Fold in chips.
Pour batter into a greased 9 x 13 pan and bake for 40 minutes. When cool, cut into 24 bars.
Pour batter into a greased 9 x 13 pan and bake for 40 minutes. When cool, cut into 24 bars.
Thursday, October 13, 2011
Pumpkin Whoopie Pies
I've always wanted to make whoopie pies and thought I'd try these to finish up the can of pumpkin I had opened. Pumpkin and cream cheese are such a yummy combination and a wonderful taste of Fall!
Pumpkin Whoopie Pies
Cookie
2 cups flour
1 teaspoon baking soda
1 teaspoon pumpkin pie spice
(1/2 teaspoon cinnamon, 1/4 teaspoon ground ginger, 1/4 teaspoon nutmeg)
1/2 teaspoon baking powder
1/2 teaspoon salt
1 cup firmly packed brown sugar
1/2 cup softened butter
1/2 cup canned pumpkin
1/4 cup milk
1 egg
1 teaspoon vanilla
Filling
1 (8-ounce) package softened cream cheese
2 tablespoons softened butter
1 teaspoon ground cinnamon
1 teaspoon vanilla
4 cups powdered sugar
Combine flour, baking soda, pumpkin pie spice, baking powder and salt in a bowl and set aside.
Beat butter and brown sugar until creamy. Add pumpkin, milk, egg and vanilla. Reduce speed and add flour mixture. Beat until well mixed.
Drop batter by level tablespoons onto ungreased cookie sheets. (I used a small cookie scooped and silicone baking liners)
Bake 10 minutes in a preheated 350 degree oven. Cool 2 minutes on cookie sheet, then cool completely on cooling rack.
Combine all filling ingredients except powdered sugar and beat until smooth. Gradually add the powdered sugar, beating until creamy.
I put the mixture into a ziploc bag and snipped he corner off. Spread the filling on the bottom side of one cookie. Top with another cookie bottom side down.
This recipe made 2 dozen.
Monday, October 10, 2011
French Toast Muffins
I am officially addicted to Pinterest! I came across a delicious looking picture of these muffins and thought I'd make them for my kids as a special breakfast treat.
French Toast Muffins
recipe from Velvet Lava Cafe
1/3 cup melted butter
1/2 cup sugar
1 egg, room temperature
1 1/2 cups flour
1 1/2 tsp baking powder
1/2 tsp salt
1/4 tsp nutmeg
1/2 cup milk
Mix dry ingredients in a large bowl. Add wet ingredients and stir until combined, don't over mix. Using a large ice cream scoop, scoop batter into a greased muffin tin. (I got 8 muffins from this amount of batter) Bake 20 minutes at 350 degrees.
Topping
1/2 cup sugar
1/2 cup melted butter
1 tsp cinnamon
Mix sugar and cinnamon in a small bowl. Place melted butter in another small bowl. Dip the warm muffins in butter and then cinnamon sugar.
*Everyone enjoyed them but it seemed as though something was missing. I think next time, I will add 1/2 tsp of vanilla to the batter. My daughter enjoyed hers with syrup!
Sunday, October 2, 2011
Dairy Free Pumpkin Bread
I love the flavors of Fall, especially pumpkin! If you love pumpkin bread, you've got to try this one. It's extremely moist and full of flavor. You won't miss the eggs or milk at all!
1 3/4 cup all purpose flour
1 cup dark brown sugar
1/3 cup white sugar
1 tsp baking soda
1 tsp cinnamon
1 tsp nutmeg
1/2 cup vegetable oil
Dairy Free Pumpkin Bread
1 3/4 cup all purpose flour
1 cup dark brown sugar
1/3 cup white sugar
1 tsp baking soda
1 tsp cinnamon
1 tsp nutmeg
1/2 cup vegetable oil
Saturday, October 1, 2011
Royal Icing vs. Glaze
About a year ago. I got into cookie decorating and started surfing the web to see how people were decorating theirs. As I was admiring everyone's beautiful creations, I couldn't help but notice how different the icing looked on some cookies. I didn't realize that different decorators used different types of icings. For instance, Sugarbelle uses Royal Icing (which is how I thought everyone did it), Cookie Crazie uses a corn syrup glaze, and Karen's Cookies uses meringue buttercream.
Though I've never tried the meringue buttercream, I have used both Royal Icing and corn syrup glaze. Each has it's pros and cons.
Though I've never tried the meringue buttercream, I have used both Royal Icing and corn syrup glaze. Each has it's pros and cons.
Royal Icing
To me, this icing looks the most professional and seems to dry quicker, to a nice, rock hard finish
but, the taste isn't fabulous. It needs quite a bit of flavoring and a really delicious cookie to sit on! It is also more expensive to make since I don't like to use raw egg whites and have to purchase meringue powder. Lastly, it takes a lot more coloring to get deep shades.
Glaze
In my opinion, this icing is very sweet, but tastes so much better! I also love the way it takes on a rich, vibrant color without having to use too much.
On the down side, it can be hard to get the right consistency. I've run into problems where it seemed thick enough, but then ends up running off the cookie. It also takes longer to dry and tends to look a little more translucent.
What's your opinion?
On the down side, it can be hard to get the right consistency. I've run into problems where it seemed thick enough, but then ends up running off the cookie. It also takes longer to dry and tends to look a little more translucent.
What's your opinion?
Friday, September 23, 2011
Apple Treats
My favorite time of the year has arrived and I was very excited to go apple picking with my family. Every year, we go at least once, (usually 2 or 3 times!) and enjoy an afternoon filled with a hay ride, apple picking, cider donuts and farm animals.
We came home with lots of apples and so far, I've done the following with them
Stir into cream cheese mixture.
We came home with lots of apples and so far, I've done the following with them
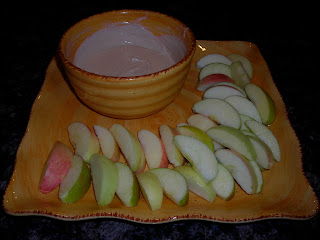
Apple Dip
8 oz. softened cream cheese
1 tsp. cinnamon
1/2 tsp. vanilla extract
Mix all of the ingredients together and then chill until it firms up a little. Serve with sliced apples!*
*To keep sliced apples from turning brown, toss the slices in a little bit of lemon or orange juice!
and . . . . .
Dutch Apple Mini Tarts
(compliments of Pampered Chef)
1 package (15 ounces) refrigerated pie crusts
Filling
4 ounces softened cream cheese
1/4 cup firmly packed light brown sugar
1 egg
2 tablespoons flour
1/2 teaspoon cinnamon
1/2 teaspoon vanilla extract
3 cups peeled, chopped apples (I used Cortland)
Topping
3 tablespoons firmly packed light brown sugar
3 tablespoons flour
2 tablespoons butter
Directions
Preheat oven to 375 degrees. Roll out 1 pie crust and cut 12 circles using a cookie/biscuit cutter.
Press into mini muffin pan using the handle of a wooden spoon. Repeat with remaining crust.
For filling, mix cream cheese until smooth. Whisk in sugar until fluffy. Mix in egg until well blended.
Stir in flour and cinnamon until smooth.
Peel and slice apples. Chop into small pieces.
Stir into cream cheese mixture.
Fill prepared muffin cups with apple mixture, filling over top of pastry.
For topping, combine flour and brown sugar. Cut in butter until it forms coarse crumbs.
Spoon over apple filling.
Bake 18-20 minutes. Let cool in pan 5 minutes before removing.
Serve warm or at room temperature. Enjoy!
Subscribe to:
Comments (Atom)


