Friday, April 12, 2013

Easy Penguin Cookies

To celebrate the completion of a unit on penguins, I volunteered to make some cookies for Ava's class. After I had already volunteered, I realized I didn't have a cutter!

 I thought about all the different cutters I had and how I could somehow transform one of them into a cookie that would somewhat resemble a penguin.  I guess it was a good thing i still hadn't put my Easter cutters away yet because when I saw the egg/oval cutter, the wheels started turning!

Next, I turned to Pinterest to see if anyone else had the same idea.  Lo and behold, they had!  Here's what I came up with:

I used this recipe for the cookies and even though I'm a Royal Icing kinda girl, I was running low on meringue powder, so gave glaze icing another try.  They were super simple and the kids loved them!

Friday, March 29, 2013

Jellybean Topiary

I have to admit it.  I really don't like when Easter comes in March, even if it is the very last day.  I just feel like everything was rushed and by the time I put away my cute St. Patrick's Day decorations, my even more adorable Easter decorations had so little time.  Oh well, there's always next year!

Anyway, I found some left over (extremely stale!)  jellybeans from last year and wanted to use them for some type of craft project.  One trip to the Dollar Tree and I was all set!  To make my topiary, I bought the following supplies :


package of Styrofoam balls
ceramic pots
ribbon
Styrofoam blocks
hot glue sticks
wooden dowels (Joann Fabric)
jelly beans (left overs)
Easter grass (more left overs)


In small sections, I covered the ball with hot glue and stuck on the jellybeans.  I made sure to leave a spot at the bottom to stick the dowel in.  Then, I put a block of foam in the pot and and stuck the stick in that.  I covered up the foam with Easter grass and finished it off with a bow.  Here it is!
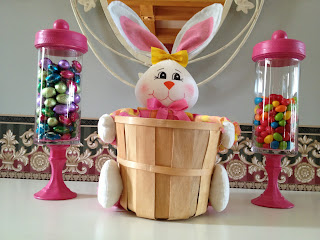
I also made a few more apothecary jars,
Let's not forget my Easter Egg Wreath
I also found some time to make these adorable chick cake pops 


HAPPY EASTER!

Friday, March 15, 2013

Happy St. Patrick's Day!


Well, hello there!
I guess it's a good thing I'm not a professional blogger because I obviously wouldn't be any good at it!    Well, I finally decided to try a new recipe and had a little time to sit down at the computer to tell you all about it.  In honor of St. Patrick's Day and the bottles of Guinness I forgot were in the fridge, I bring 
you . . . . . .

CHOCOLATE GUINNESS COOKIES WITH BAILEYS GLAZE

cookies
2 sticks room temperature butter
1 1/2 cups sugar
2 eggs
1/2 cup Guinness
2 cups flour
1 cup cocoa powder
1 tsp salt
1 tsp baking soda
1 cup chocolate chips

glaze
powdered sugar
Baileys Irish Cream Liquor


  1. Mix butter and sugar until smooth
  2. Add eggs until fluffy
  3. Add Guinness
  4. Add dry ingredients until well mixed
  5. Fold in chocolate chips
*My personal preference is to chill the dough before baking but it isn't necessary.

     6.  Using a cookie scoop, scoop dough onto lined sheets
     7.  Bake at 350 degrees for 10 - 12 minutes
     8.  Let cookies cool on rack
     9.  Mix some powdered sugar with some Baileys until desired consistency and drizzle over cooled 
          cookies
These cookies are DELICIOUS!!  Crisp outside, soft and gooey in the middle, the perfect combination of chocolate with Guinness and the glaze definitely puts them over the top!

While we're celebrating, might I remind you of my Irish Car Bomb Cupcakes.

HAPPY ST PATRICK'S DAY!


Sunday, December 9, 2012

Guess Who?!

If you have young children, I'm sure you know all about Elf On The Shelf.  This is the fifth year "Joey" has been visiting our house and when I came across some cookies sporting his resemblance, I just had to give them a try.

Now, I'm not nearly as talented as Bridget from Bake at 350, but my kids were absolutely thrilled when they saw them!  I think I may make them again for Ava's class and hopefully they'll come out even better.

The complete tutorial can be found here.

I used my new favorite sugar cookie recipe and made the template from a Cool Whip lid.
I'm looking forward to trying them out again!

Tuesday, October 30, 2012

My New Favorite

I always thought the recipe I used for my sugar cookies was good, but I think I may have finally found the best recipe ever!  The dough is smooth, easy to work with and doesn't need to chill.  Best of all, the cookies taste fantastic on their own as well as iced.  I've used this one recipe two different ways to bake up some adorable Halloween treats.

Sugar Cookie Dough

1 cup (2 sticks) butter at room temperature
1 1/2 cups confectionery sugar
1 egg at room temperature
3 tsp flavoring (I used 1 1/2 tsp orange and 1 1/2tsp vanilla)
2 1/2 - 3 cups flour

Cream butter and sugar until smooth.  Mix in egg and flavoring.
Mix in flour until dough is formed.

Once I had the dough made, I was able to make these:


Candy Corn Cookies
adapted from Land o Lakes

Divide the above dough into 3 equal portions.  Color 1/3 yellow (I used Americolor gel paste lemon yellow), 1/3 orange (I used electric orange), and leave the last 1/3 uncolored.

Line a loaf pan with plastic wrap and let the excess hang over.

Press uncolored dough into bottom of pan.  Follow with orange and then yellow.  Wrap with plastic wrap and chill at least 2 hours.

When dough is thoroughly chilled, remove plastic wrap and trim around edges.  Cut crosswise into 1/4 inch strips.

Cut each strip into triangles and bake at 375 degrees for 7 - 10 minutes.
I think these may be my son Max's new favorite cookie!

I packaged some up in dollar store jars and added the cute tag from http://lilluna.com/no-tricks-just-treats-jar/
What a yummy treat!

I also made a batch of dough to decorate for Halloween.  These are for Ava to bring to school.

Wednesday, October 10, 2012

Copy Cat Halloween Crafts

I wish I could take credit for my Halloween decorations, but unfortunately, I'm what you might call a copy cat.  Everything you see here came from someone else's idea with my own spin on it.

I just loved the idea of a tulle wreath.  There are tutorials and pictures all over Pinterest.  For this wreath, I took a Dollar Tree wreath form and tied strips of tulle all the way around.  The tulle came in spools in these great Halloween colors at Joann Fabrics.  I finished it off by hot gluing some sparkly spiders.
My mantel got decorated with these spider topiaries.

As soon as I saw this, I knew I had to make one.  It's sitting right outside my front door!


I downloaded some Halloween subway art and put them in dollar store frames


and followed this tutorial to make a few spooky ghosts.


Here they are displayed with my diy apothecary jars.

I may not be original, but I had fun making them all!

Wednesday, September 26, 2012

Spider Topiary

Once again, I came across a pin on Pinterest that I wanted to replicate but change up a little.


I got the cute buckets in the dollar bin at Target.  I inserted a foam block inside and then covered the block with orange paper shreds which were also found in the dollar bin.

I spray painted 2 dowels orange and inserted them into the foam block.

Next, I took 2 Styrofoam balls from Michaels ($4.99 each plus I used my 40% coupons!)
and painted them black with craft paint.  When they dried, I pressed them into the dowels.

I bought 2 bags of plastic spiders in the Halloween section of Target and hot glued them to the Styrofoam.  I glued a few spiders to the dowel too.

Here they are displayed on my mantel.
 *Original pin from Crafts by Starlight